Leica Cyclone – Cleaning Registered Data
Welcome to part two of this three-part video series looking at cleaning scans in Cyclone. You can download the cyclin database used in this video series by clicking on the link in the video description.
Unifying Data
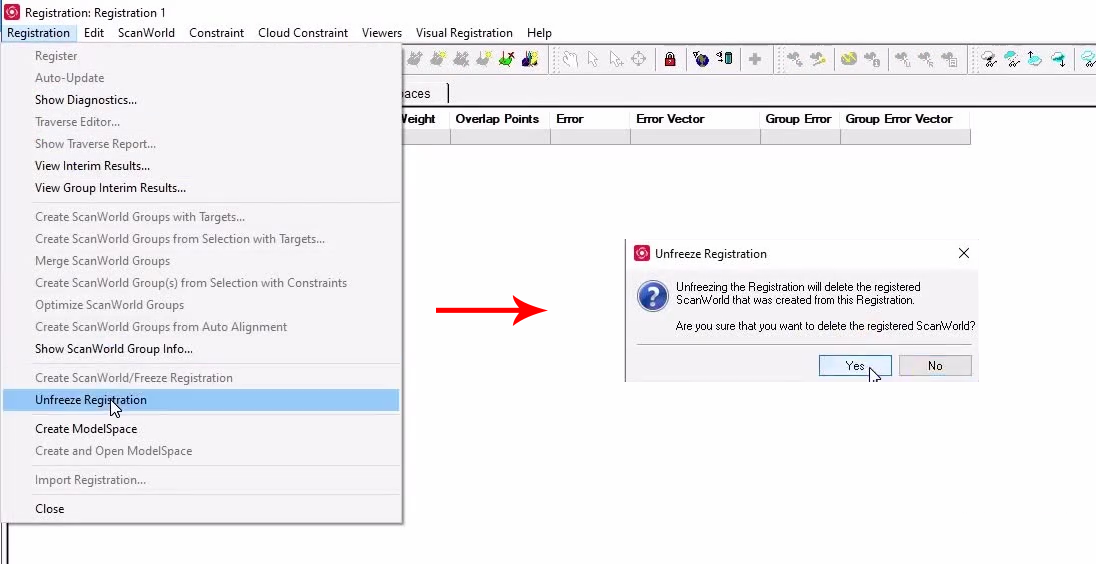
In the previous video, we looked at cleaning scans on a per scan basis. The advantage of doing it this way, rather than cleaning a unified cloud is that if you discover an error in your registration, you can always delete your model space. back into your registration, unfreeze your registration, modify it as needed, maybe you’ve got forgotten to add a scan world or maybe you discover an error with target heights or something.
And then, once you’ve reregistered, you can create your model space. And it will pull through those clean clouds. And we’re going to look at working with the registered point cloud, here it is. Now you could choose to clean your scans in the registered point cloud.
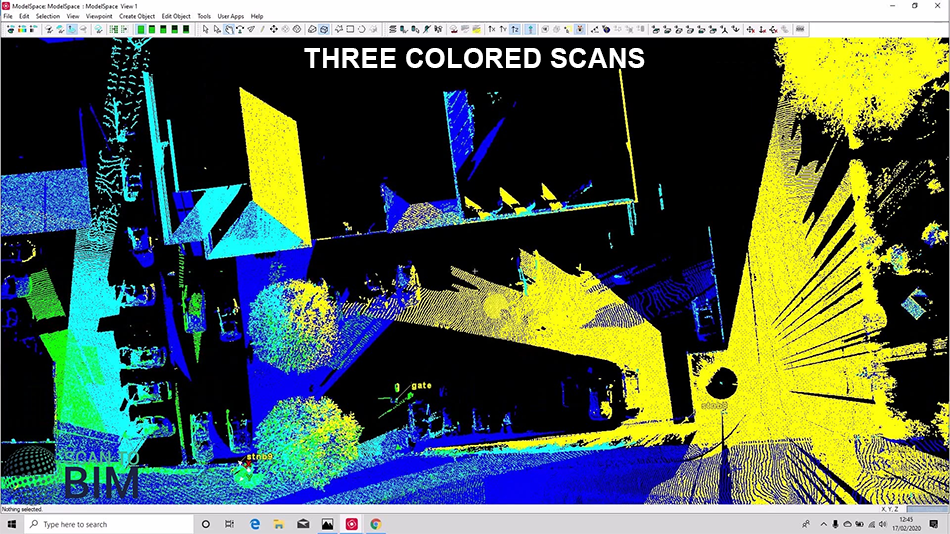
For example, if you were using limit boxes to clean your scan data could, for example, clean the scans one by one in here. Or if you’re using limit boxes, you could go to view, set limit box by the cursor. Take a look at this car. And it’s been scanned in multiple scans just demonstrate that. You can see it’s been scanned in these three scans because we’ve got three different colors. And by cleaning it out here, if you’re using limit boxes to do your cleaning, you’ve only had to draw the limit box once rather than three times you can of course use the region growing here on a per scan basis, then set the default clouds and work that way. But we’re going to look at unifying now.
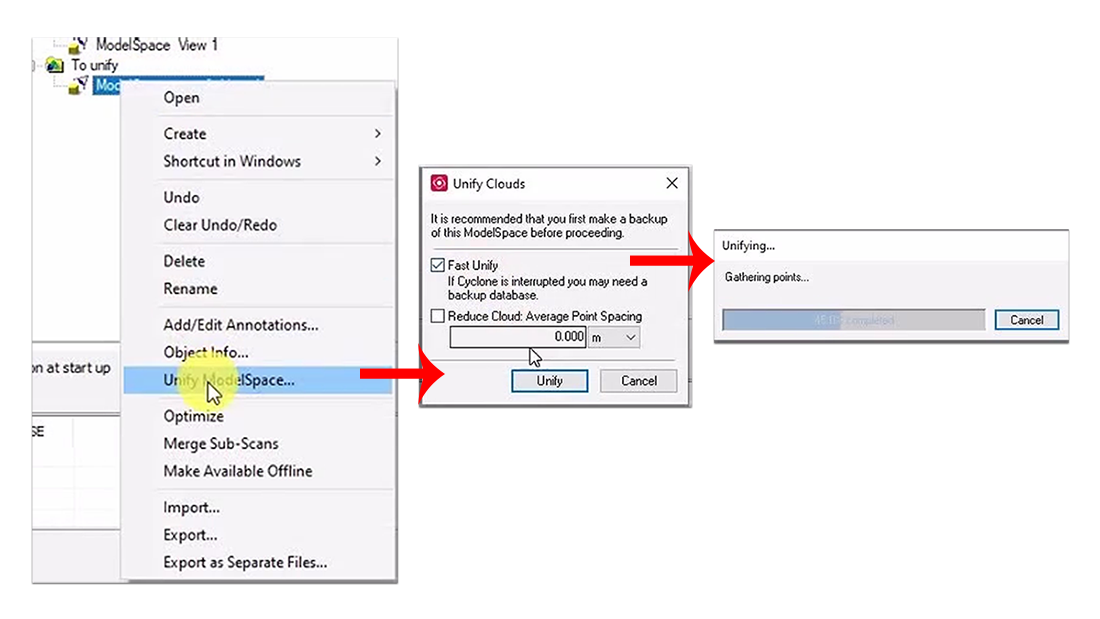
Unifying its use it loses the individual scan world’s data or becomes one giant scan world. We’re going to say selection, select all tools to unify for fast unify, and can choose to reduce the point cloud spacing. But we’re not going to in this video, we’re just going to join all the scans together.
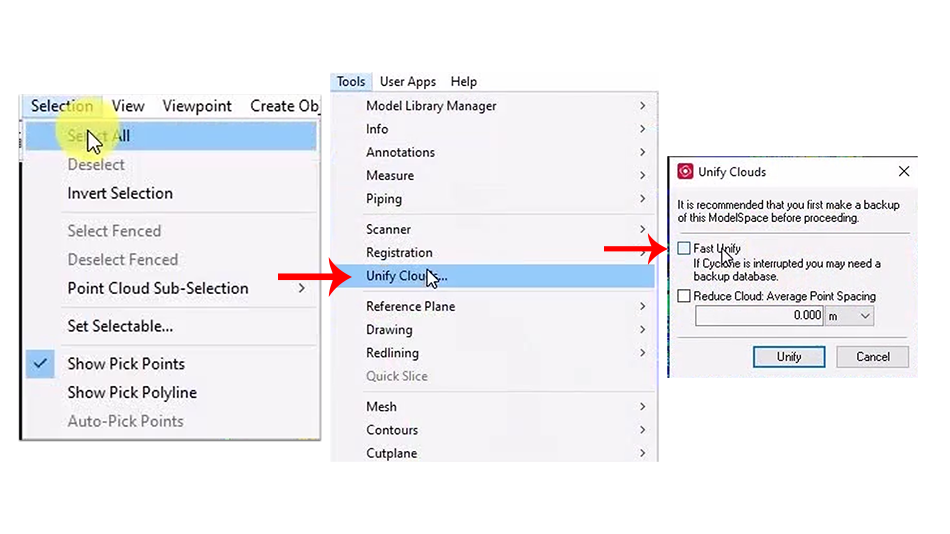
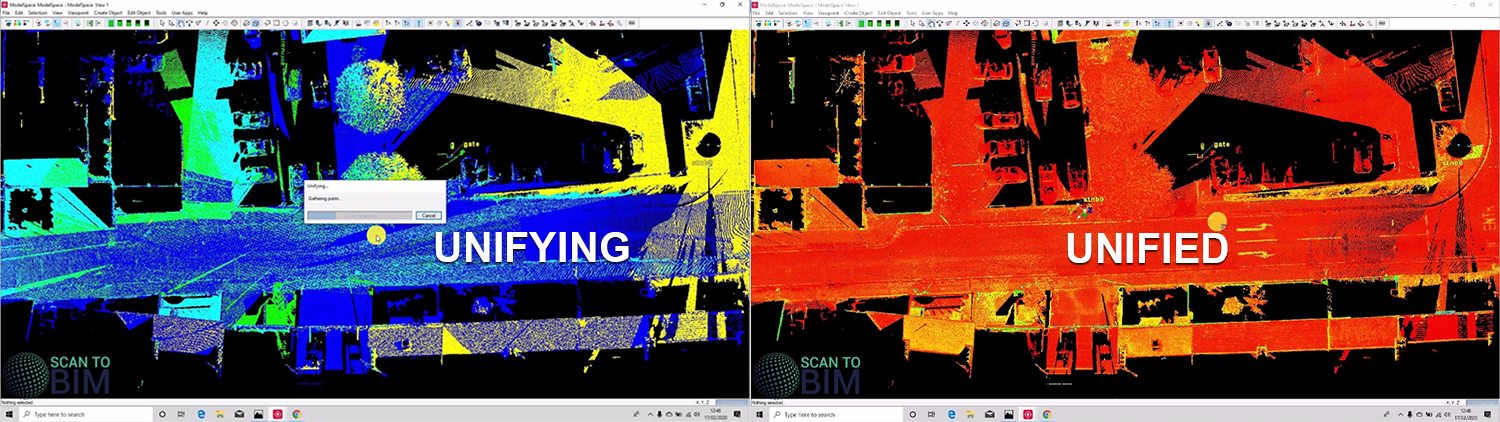
Unifying can take quite a long time, depending on how many scans you’ve got. And does have the effect of increasing performance when you unify data. Now our data is unified.
One of the advantages of unifying the data is that we can edit data all at once and reduce duplication of work. If we look at these people, tripods, those tripods are scanned in multiple scans can make a selection and careful not to select or say add inside the fence. Copy selected a few points on the tree. Just remove points inside the fence. Pick a point on the pavement to create an object, we can grow my surface you can say it’s quite quick and easy to remove the noise. I want you to explain a bit about working with layers. Let’s have a look. Here are instances where you might be asked to layer point cloud. We’re going to have a go here layering paint lines by intensity. We’re going to select the points inside this limit box and pick a point on the paint line. We’re going to save create object segment cloud by intensity. And it’s not worked terribly well. We’ll choose a different pick point. I’ll run the tool again to create an object segment cloud by intensity. Still not really done what we wanted. Instead of doing that, we’ll pick a point on the road. Official try the other way around. To create an object segment cloud, cut by intensity. And that’s much better, you can see that selecting more of the road surface, just try and get perfect selection by saying create an object, segment cloud, cut by intensity. And we’re going to click segment because that’s looking pretty good.
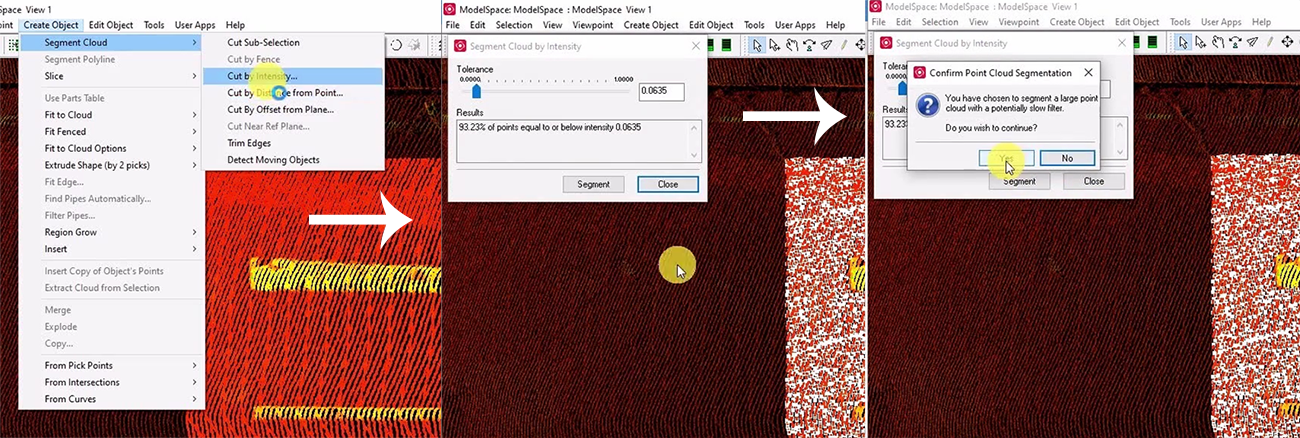
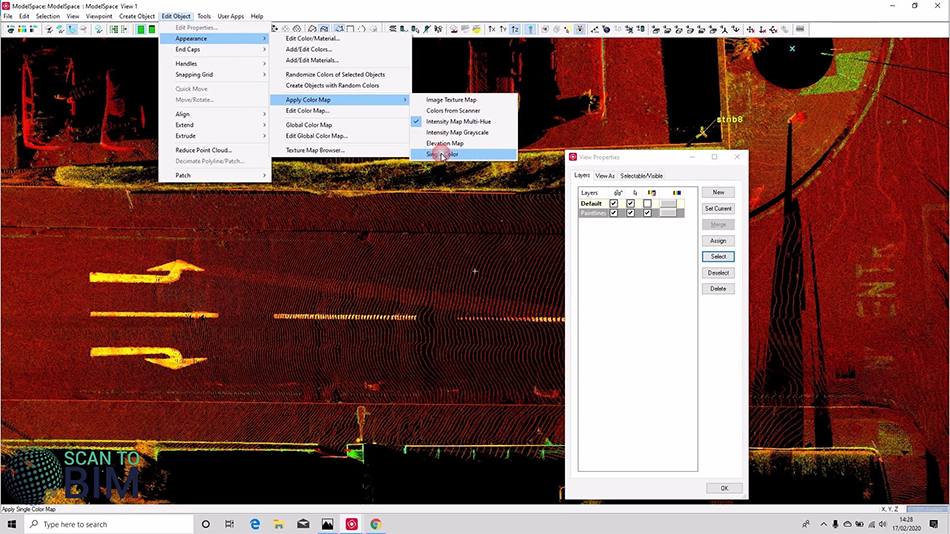
And now you’ll see that we have paint lines, they’re nicely isolated from that piece of road. What I’m going to do is I’m going to remove points that are outside of this limit box, move points outside the fence leaves me with just the paint time selected. And you can see we’ve got got a few points that are a bit spurious, they still relate to the road. But for the most part, that’s a good selection, we could always improve upon it by using the limit box to remove some more of the spurious points. We’re left just with the paint lines if we press Shift, and now we can make a new layer, call it to paint lines. And we can assign those points to that layer. Now, if we wanted to, you could select that layer and give it a single color. It’s defaulted to gray, but you can choose the color, you felt was representative. Now we have the paint lines that we can turn on and off. And you can see, we’ve now got two point clouds, though on our default there.
We might like to join those back together again. But if we run unify in this space, we’re going to unify the pain areas as well. Let’s look at how we could deal with that, we could turn the paint layers off, select the default layer, that two-point clouds. if we go to cylindrical visible on the vertices, we select the point cloud to cloud selected, we can copy those to any model space. And you’ll see that we have our dialogue our model space with our model space view. And we now have a copy of the model space. We could rename this to unify.
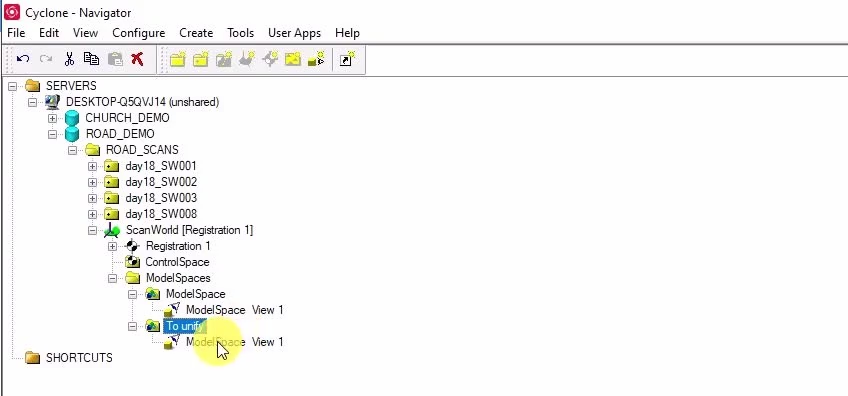
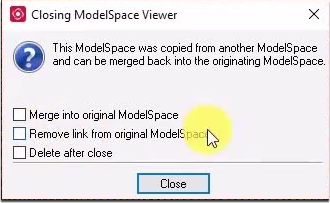 Call it huddle space to unify. Then I close this one down, it’s asked for a copy of the model space, it’s asking do I want to merge it back do I want to remove the link from the original space do I want to delete it, just going to say close to that message. Don’t want to do anything, we’re going to open this one. And we’re going to unify it again, actually a different way of unifying, you can right-click here. And you can say unify model space. Now our model space is unified.
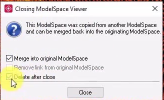
This is to parent world if you like step one will be selected and copy to the new model space, what we can do is we can delete the two-point clouds selected here. You can turn on the paint line there if we want. And that’s now all that’s present in this model space.

We can go to us to unify space. If we select all can see, there’s just one cloud now. If we close the model space view, we can select these options on closing, we’d like to merge it back to the original model space. And we’d like to delete it once we’ve closed it.
Excellent! You can see we’ve now just got our original model space view. And yeah, there’s our default layer with just one point cloud. And we’ve got our paint lines there. We’ve just got two clouds again, on a real job, who would probably have had more than two clouds before you decided to reunify. But like I say once data is unified, that you get increased performance. The more you segment a cloud, the slower things tend to get.
In the next part, we’re going to look at exporting data to other programs. In particular, recap, recap format is particularly useful, you can supply a point cloud viewer to your client. And also you can import the data to AutoCAD to work with it from there. See you in the next part. If you found this video useful, please don’t forget to hit like, share, and subscribe. Thank you for watching.