
REGISTRATION BASICS – Part 3: Cloud Based Registration
Welcome to part three of this series looking at basic work flow inside Leica Cyclone. You can download the cyclone database by clicking on the link in the video description.
Cloud-based Registration
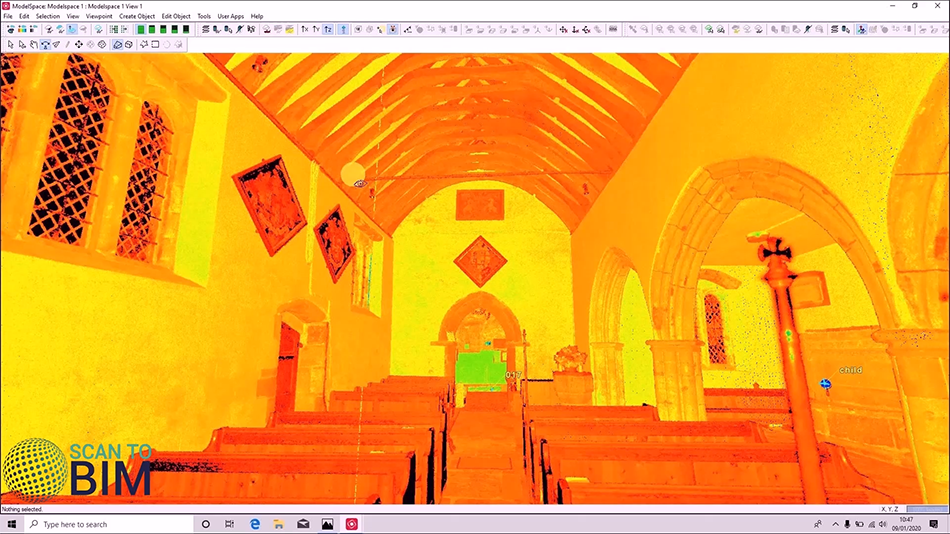
In this part we are going to be talking about cloud-based registration. Registration is the process by which multiple scans are joined together. We already have covered the target-based registration in a previous video. Certain environments such as scanning inside a building are ideal for cloud-based registration. This is due to having surfaces that are stable and having readily identifiable plain. Here we can see have data on this wall, having insufficient overlapping data on any of these primary directions can cause slippage in the alignment and produce a poor result.
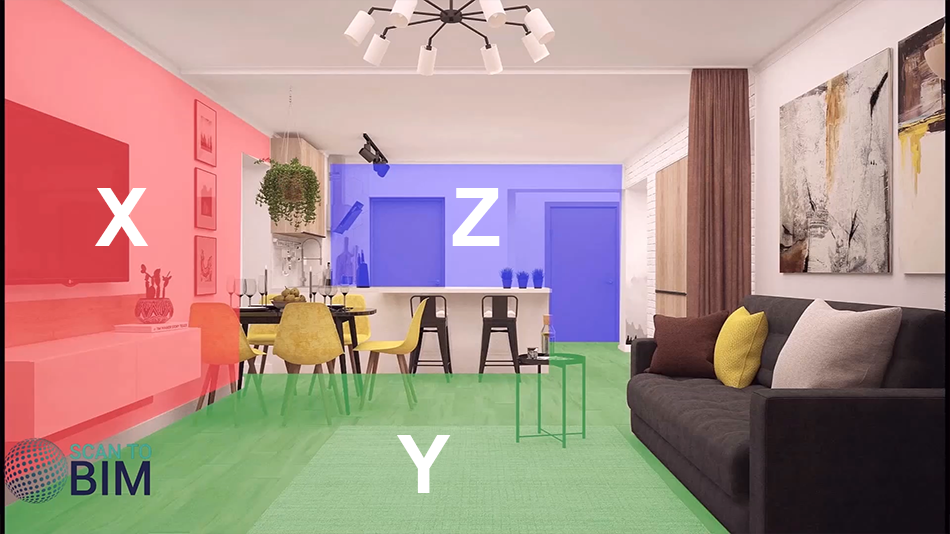
To make that clear we will look at a room. If we were to scan here, we would record data on the plains X, Y, and Z directions.
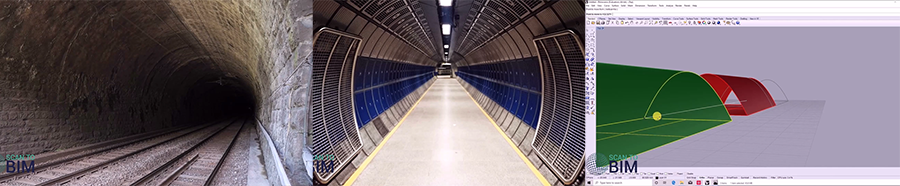
By way of contrast a tunnel or linear hallway with repeating features is often an unsuitable environment for cloud-based registration. In this graphic you can see where the slippage would occur as there are no detail to lock you in the y axis. In these environments target-based registration is recommended.
In our previous tutorial we were looking at scans carried outside the church these are not suited for cloud registration due to the trees and bushes that would move around slightly in the wind from one scan to the next. The stability of the environment is the key to getting a good cloud registration, for example on a recent project scanning inside a power station vibration for machinery meant cloud-based registration is unsuitable the software just doesn’t recognize that the objects in the data moving slightly.

The cloud registration has been used had slightly misaligned and once a number of scans have been registered propagation of error might have resulted in a bad registration. The solution in this case was to place targets on solid structural beams that weren’t vibrating. In the case of this church scan data, it is still possible to use cloud-based registration but one would have to remove trees and bushes from the data prior from running the cloud alignment and we would look to do that in a subsequent video.
VISUAL ALIGNMENT
We are now going to open up another scan carried out inside the church and we are going to cloud register it to the adjacent scan. Now the adjacent scans carried out were next to this speaker and have a quick look at that scan as well. You can see we are now adjacent to the speaker so there is going to be a nice overlap between the two scans for us to use in our cloud registration.

If I create a registration, we can add those two scan worlds so first we are going to do visual registration. Visual alignment, zoom in here, ![]() the controls here are same as in Cyclone’s model space, at the moment we are locked in a 2d view.
the controls here are same as in Cyclone’s model space, at the moment we are locked in a 2d view.

We can click that button ![]() and then we are free to navigate this can be useful in understanding how two scans align but when you do your cloud alignment you need to in the preset view. We are just going to rotate
and then we are free to navigate this can be useful in understanding how two scans align but when you do your cloud alignment you need to in the preset view. We are just going to rotate ![]() the point out so it lines up then we are going to the move it into position and that’s a pretty good fit. We will now view the data in elevation view, viewpoint elevation view, just rotate around a bit, you can see it is pretty well lined up already but just move it up and down till you get a good visual alignment, that looks good.
the point out so it lines up then we are going to the move it into position and that’s a pretty good fit. We will now view the data in elevation view, viewpoint elevation view, just rotate around a bit, you can see it is pretty well lined up already but just move it up and down till you get a good visual alignment, that looks good.
Just go back to the top view everything looks great and we’ll optimize that constrain. We can see that our histogram is looking good, the data is nicely on the bell-shaped curve there. Here we got errors and the number of points on our various axis, there’s nothing like the north point error it is more like 6mm, just click okay to this message. Here is our cloud alignment result. We have a root mean squared error or 7mm, which is very good.
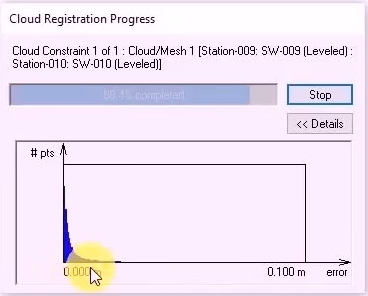 RMS means the Root Means Square error of the alignment if the RMS is within the 1 cm range the alignment is likely to be good. We can see that the average error is 4mm and we can see the points that have been used in the overlap. We have a status here that says aligned. Sometimes if you have a poor overlap Cyclone will tell you that it is under constrained. We’ve also asked if we want to merge scanned or groups. We’ll come unto more groups in subsequent video tutorial but for now, we are just going to say “no” to that message.

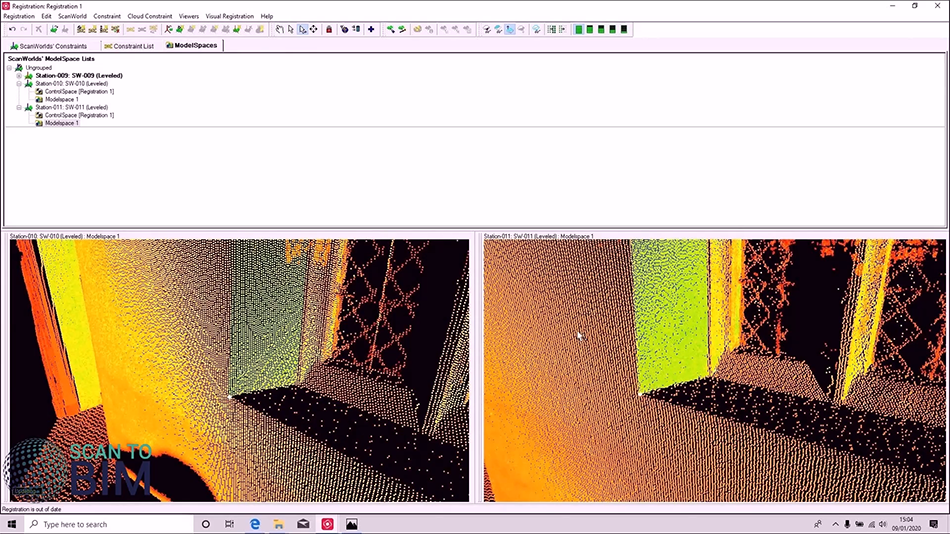
Now we are going to look at adding in another scan, we will add in scanner 11. We are going to look at a different method of cloud alignment. For this one we are going to swap to the middle spaces tab, we are going to load, scan model 10, and we are going to load scan model 11, and I’m just going to drag this out a little bit, so the way this 3 point registration works is, we just zoom out, we have to identify three common points in both scans it is more manual mess than the alignment. Let’s get started with the same corner in both scans, we will use the multi-pick tool to pick one point, and then we just have to identify two other areas in some other corner, lets cyclone get the initial hints it needs to do the cloud registration. When we picked our three points right-click, cloud constraint, add cloud constraint, we’ve only matched two points so let’s go back, to add in another one, it was not to accurate enough with my picks, let me try that, this time it worked.
 We don’t have a link between stations 10 and 11 that is not aligned, so right-click on that, click constraint optimized, and we have a nice histogram right here. We get this warning to say that it reached the limits of its duration click “okay” to that. As you can see from the last one, this has the Root Means Square of 6mm which is good, the last one was at 10, this has an RMS value of 6mm in general. We will accept that, and register that data.
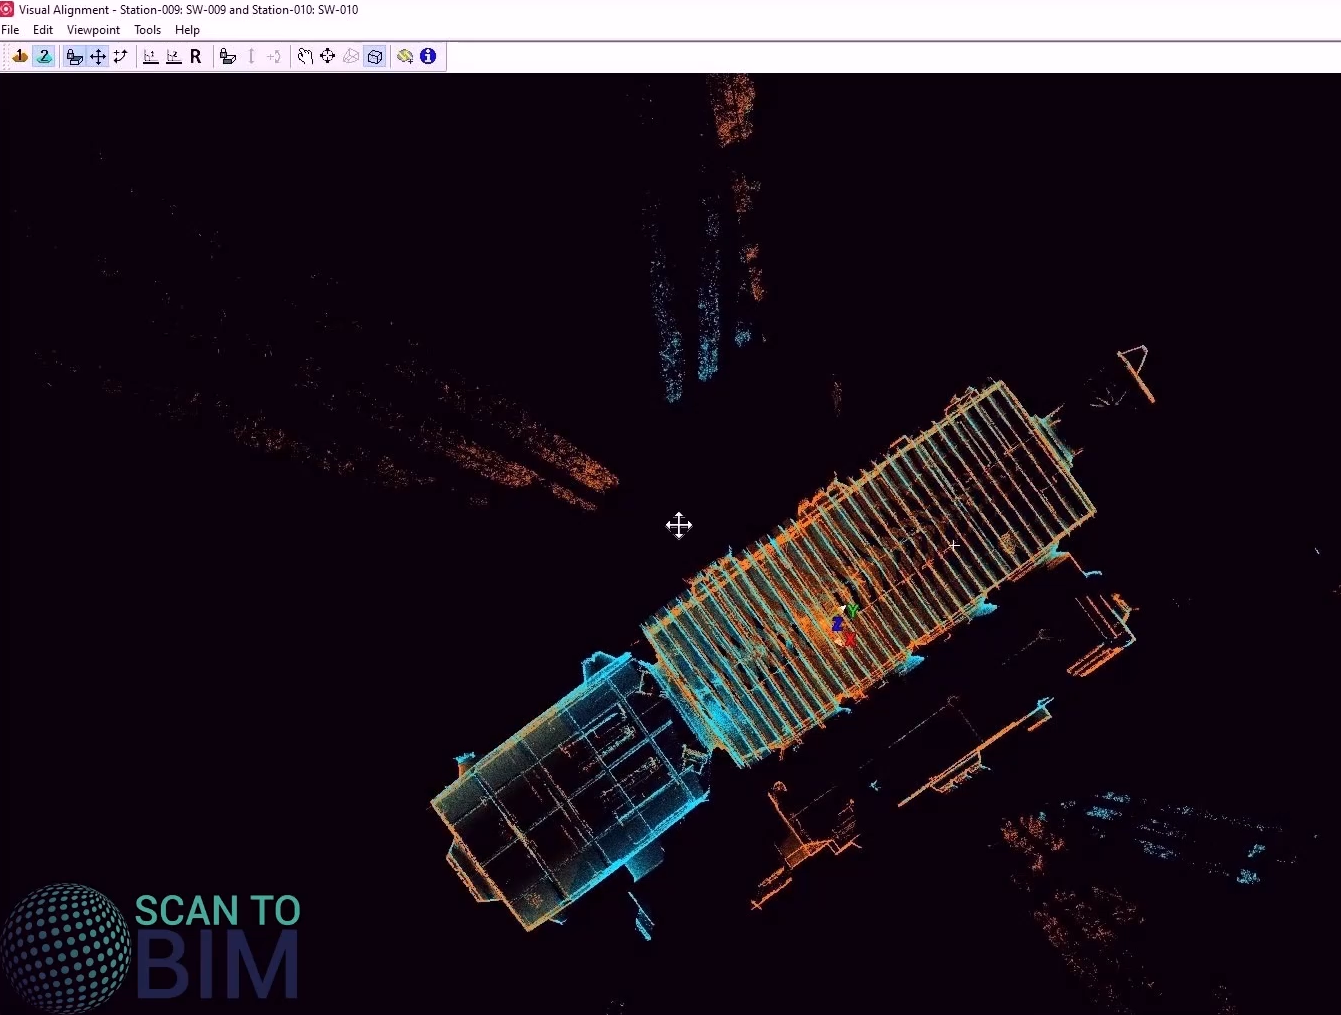
If we want to verify our registration, view interim results as we have done in previous examples, and we can cut the section, and independently colorize the scans by going to tools, scanner, scan world explorer, then go the top-down view, you can see that we have a nice tight registration. We have our links now between scan mode 9 and scan mode 10 though we don’t have a link between 11 and scan mode 9. If we wanted to create that link, we can go to cloud constraints, auto add cloud constraints, and it will automatically add in the cloud constraints. And again we have our RMS, then we can register.
Summary
We can wrap up this video by saying you can that you can use targets as well as cloud constraints in your registration work, and quite often a good workflow is to complete a project by registering targets and then maybe tighten up the registration with cloud constraints. We already touch on earlier the stability of the environment being key to getting a good cloud registration, the major factor determining the effectiveness of your cloud constraint is the number of overlapping scans, and the higher the number of points assigned that are put in overlapping points the better the registration will be. A common mistake when people are scanning inside buildings is to go from one room to the next room and then there’s a doorway you have a narrow field of view into the next room, a good trick is to always do a scan right in the middle of the doorway, that you have a good overlap between the two rooms.
That concludes this video thank you for listening and we will see you in the next one.